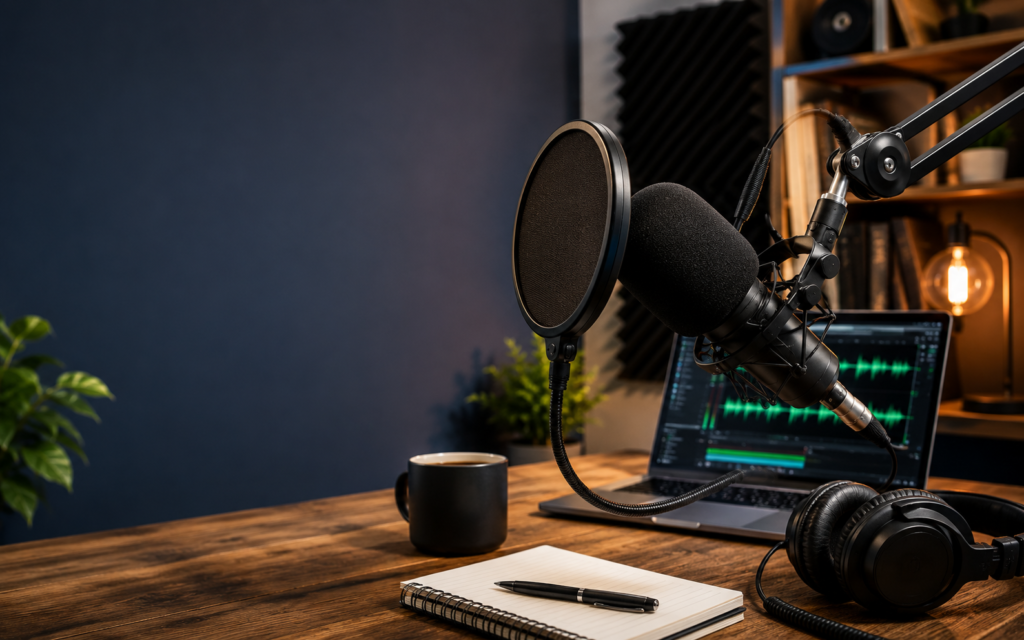
The right podcast setup equipment starts with five items: a microphone, wired headphones, a boom arm or stand, a pop filter, and recording software. USB mics suit beginners; XLR mics with an audio interface suit advanced setups. Most podcasters can start for under $100.
What Podcast Setup Equipment Do You Actually Need?
You need less than most gear lists suggest. Working podcasters consistently report that a single dynamic USB microphone, a cheap pair of wired headphones, and a quiet room produce publishable audio. Everything else is an upgrade, not a prerequisite.
The 5 Non-Negotiable Items in Any Podcast Setup
- Microphone: captures your voice; everything else supports this
- Headphones: wired, for monitoring your audio during recording
- Boom arm or desk stand: keeps the mic positioned consistently
- Pop filter: blocks plosive bursts from “p” and “b” sounds
- Recording software: Audacity (free, all platforms) or GarageBand (free, Mac)
That’s the complete list. None of it requires a mixer, an audio interface, or a dedicated studio.
What You Probably Already Own
A laptop covers the software role with a USB mic. Earbuds substitute for headphones to start. A quiet room such as a closet or carpeted bedroom handles acoustic treatment for free.
What to Skip Until You Have 10 Episodes Published
Acoustic panels, a mixer, a second microphone, any Bluetooth accessory. These are legitimate investments at the right stage. Buying them before you’ve built a recording habit means hundreds of dollars in gear and only a handful of published episodes.
Podcast Equipment Setup Cost by Budget Tier
Your total outlay depends on which ecosystem you choose and how many hosts you record. Below are honest 2026 street prices.
Tier 1: Beginner Setup ($70–$120)
- Microphone: Samson Q2U or Audio-Technica ATR2100x (both offer USB and XLR)
- Headphones: Sony MDR-7506 or any wired closed-back set in the $30–$50 range
- Software: Audacity or GarageBand (free)
- Pop filter: $8–$12 clip-on
The Q2U and ATR2100x are the most-recommended entry mics in 2026 because they bridge USB (plug-and-play) and XLR (with an interface), so you don’t buy yourself into a dead end.
Tier 2: Intermediate Setup ($300–$500)
- Microphone: Shure SM7dB or Electro-Voice RE20 (XLR dynamic)
- Audio interface: Focusrite Scarlett Solo (recent generation)
- Boom arm: Rode PSA1 or equivalent articulating arm
- Headphones: Audio-Technica ATH-M50x or Sony MDR-7506
Tier 3: Advanced/Pro Setup ($800–$1,500+)
- Microphone: Shure SM7B, Heil PR-40, or Neumann BCM 104 (XLR)
- Interface or mixer: Focusrite Scarlett 2i2 (two-host) or Rodecaster Pro II (multi-host)
- Headphones: Beyerdynamic DT 770 Pro (closed-back, 80-ohm)
- Acoustic treatment: four 24″×24″ 2-inch acoustic panels minimum
Podcast Setup Tier Comparison
| Tier | Key Gear | Total Cost (2026) | Best For |
| Beginner | USB dynamic mic, wired headphones, free DAW | $70–$120 | Solo host, first 10–20 episodes |
| Intermediate | XLR dynamic mic, Scarlett Solo, closed-back headphones | $300–$500 | Serious solo or two-host show |
| Advanced/Pro | High-end XLR mic, Rodecaster Pro II, acoustic panels | $800–$1,500+ | Multi-host, video, commercial production |
USB vs. XLR Microphones: Which Is Right for Your Setup?
USB microphones connect directly to any laptop. XLR microphones require a separate audio interface. That single hardware difference creates two ecosystems with different upgrade paths.
A USB mic contains a built-in analog-to-digital converter, plug it in, it works. An XLR mic is a passive transducer; your interface converts the signal, provides phantom power, and gives you proper gain control. The sonic difference between a quality USB mic and a quality XLR mic is audible but not dramatic. The difference between either and poor mic technique in an untreated room is enormous.
USB vs. XLR Decision Framework
| Factor | USB | XLR |
| Budget | Under $150 total | $250+ (mic + interface) |
| Setup complexity | Plug and record | Interface, cables, gain management |
| Portability | High, one cable | Lower, interface and cables |
| Upgrade path | Limited; mic replacement required | Modular, swap mic, keep interface |
| Multi-host recording | Possible conflicts | Clean multi-channel via interface |
Best beginner choice: A dual-connection mic like the Samson Q2U or Audio-Technica ATR2100x offers simultaneous USB and XLR outputs. Start USB; add an interface later without replacing the mic.
Microphone Types, Pickup Patterns, and Placement
Dynamic vs. Condenser Microphones for Podcasting
Dynamic microphones reject off-axis noise aggressively, which is why broadcast standards like the Shure SM7B have dominated radio and podcasting studios for decades, according to Wikipedia. In a home office with HVAC noise, street noise, or a neighbour’s TV, a dynamic outperforms a condenser. The trade-off is slightly less high-frequency detail.
Condenser microphones are more sensitive: beautiful in a treated space, problematic in an untreated one because they capture everything from fan noise to chair squeaks to keyboard clicks. For most home podcasters in 2026, dynamic is the default choice.
Pickup Patterns Explained
- Cardioid: captures front, rejects rear; correct for solo and multi-host where each person has their own mic
- Omnidirectional: captures from all directions; rarely useful for podcasting
- Bidirectional (figure-8): captures front and rear, rejects sides; the right pattern for two-person interviews on one shared mic
Most podcast microphones are cardioid, and that’s the right default.
Microphone Placement
Position the mic 6–8 inches from your mouth, angled 45 degrees off-axis (slightly to the side) to reduce plosive energy without sacrificing clarity. Stay consistent: same distance, same angle, every session.
Headphones, Boom Arms, and Pop Filters
Headphones: Closed-back wired headphones are the correct choice for podcasting. They prevent sound from leaking back into the mic. Wireless headphones introduce enough latency to create delayed auditory feedback, so your brain struggles to form sentences naturally. Wired only.
Boom arms: A desk stand transmits vibration directly to the mic body. A boom arm suspends the mic in space, reducing mechanical noise. If you type while recording, a boom arm is not optional.
Pop filters vs. windscreens: A pop filter (mesh on a gooseneck) physically deflects plosive air bursts before they reach the capsule, making it the right tool for studio recording. A windscreen (foam cover) is for outdoor or high-movement scenarios. Use a pop filter indoors, a windscreen outdoors.
Audio Interfaces, Mixers, and Gain Staging
An audio interface bridges your XLR mic and your computer. A mixer adds real-time channel control, EQ, and routing for multiple inputs. Most solo podcasters don’t need a mixer; start with an interface like the Focusrite Scarlett Solo.
How to Set Gain Correctly Before Every Recording
Gain is the amplification applied before your signal hits the DAW. Too little and post-production amplifies noise. Too much and you clip: unrecoverable digital distortion.
Target: average level between -18 and -12 dBFS, with peaks no higher than -6 dBFS.
The 60-second pre-session check:
- Connect your mic and open your DAW
- Speak at your normal recording volume
- Watch the input meter
- Adjust gain until peaks land around -12 dBFS
- Record a 10-second test clip and play it back
Never adjust gain mid-session.
Multi-Person Podcast Setup: In-Room and Remote
Recording more than one person multiplies every requirement. One mic per host is the minimum; shared mics produce phase and level problems that editing cannot fully fix.
Two-Person In-Room
You’ll need two XLR mics (matched dynamics reduce inconsistency), a two-channel interface (Focusrite Scarlett 2i2) or all-in-one (Rodecaster Pro II), two boom arms, and two sets of headphones. Position mics 6–8 inches away with cardioid pickup pointed away from each other.
3–4 Person Setup
One dedicated XLR input per host, minimum. The Rodecaster Pro II handles multiple XLR inputs in a single unit, making it the practical 2026 solution for ensemble podcasts. Route XLR cables away from power cables to avoid hum.
Remote Recording: Why Double-Enders Matter
A double-ender records both host and guest audio locally, then merges files in editing. This avoids the compressed, internet-degraded audio from recording a call directly.
Recommended platforms:
- Riverside.fm: local recording on each device, automatic upload, and a major creator-platform raise of $30M Series C as reported by TechCrunch
- Zencastr: browser-based, lossless WAV
- SquadCast: progressive upload, redundant recording
- Zoom: accessible but compressed; only works if participants export local files separately
Video Podcast Setup: Extra Equipment Required
Video adds a camera and lighting layer. The most important principle: never compromise audio to save money for video gear. Viewers tolerate moderate video; they abandon bad audio quickly.
A 1080p webcam with autofocus is the minimum acceptable floor for 2026. A mirrorless camera produces better image quality but adds significant cost and requires a capture card. 4K is largely unnecessary because most platforms compress to 1080p or below.
For lighting, a key light positioned 45 degrees off-axis (a $50–$150 ring light or softbox) solves most beginners’ needs. A softer fill light from the opposite side reduces shadows.
Recording and Editing Software for Podcasters
Free options: Audacity (Windows, Mac, Linux) handles everything a beginner or intermediate podcaster needs: multi-track recording, noise reduction, normalisation, and MP3/WAV export. GarageBand is a legitimate Mac alternative.
Paid options worth the upgrade:
- Adobe Audition: deep spectral noise reduction
- Hindenburg Journalist: voice-focused, automatic levelling
- Descript: text-based editing; cuts post-production time on long-form interviews
The upgrade from free to paid is justified when editing time costs you more than the subscription.
Recording Environment and Acoustic Treatment
A poor environment degrades quality faster than an entry-level mic. The clap test: clap once sharply in your space. If you hear a noticeable ring, your room needs treatment before your microphone matters.
Free and low-cost treatment:
- Walk-in closet: the best free acoustic booth most people own
- Heavy blankets hung on walls: unattractive, highly functional
- Bookshelves filled with books: diffuses reflections irregularly
Many professional voice-over artists record in closets. Invest in dedicated acoustic panels ($200–$400 for four to six) only when free options are exhausted and you’re producing at commercial level.
Common Podcast Setup Mistakes to Avoid
- Buying a condenser mic for an untreated room: it captures every reflection. Use a dynamic mic first.
- Bluetooth headphones for monitoring: latency disrupts speech fluency. Wired only.
- Over-investing in XLR before building a recording habit: start with USB; upgrade once you’ve published consistently.
- USB hubs for audio interfaces: they introduce latency and dropouts. Connect directly to your computer.
- Skipping the gain check: clipped audio cannot be repaired. Run the 60-second check before every session.
Your Upgrade Path: From Starter Gear to Pro Setup
Upgrade decisions should be driven by a specific identified problem, not by wanting better gear in the abstract.
Stage 1 → Stage 2: Adding a boom arm ($30–$80) eliminates the most common mechanical noise problems. After that, a Focusrite Scarlett Solo with an XLR dynamic mic (Shure SM7dB or Electro-Voice RE20) is the upgrade with the largest audible improvement.
Stage 2 → Stage 3: Move to full XLR with acoustic treatment when you’re producing at commercial level, have multiple co-hosts in the same room, or your intermediate setup has limitations the pro tier specifically solves.
Recommended sequence: Q2U USB → Boom Arm → Scarlett Solo → Acoustic Panels → Pro XLR Mic.
Choosing the Right Podcast Setup Equipment for Your Situation
Match your gear tier to your current recording habit, not your aspirational one. A USB dynamic mic gets most new podcasters to publishable quality for under $120. Upgrade in response to specific problems, in the sequence above, and your audio improves predictably without sunk cost.
Frequently Asked Questions
What is the minimum podcast setup equipment needed to start a podcast?
A USB microphone, wired headphones, and free recording software (Audacity or GarageBand). A quiet room substitutes for acoustic treatment. Total cost: under $100.
How much does a basic podcast setup cost?
A beginner setup runs $70–$120 in 2026. That covers a dual USB/XLR dynamic mic like the Samson Q2U, wired headphones, and free software.
Do I need an audio interface to start podcasting?
No. An audio interface is only required with XLR microphones. USB mics connect directly to any computer.
Can I record a podcast on my smartphone?
Yes. A clip-on lavalier mic and a free mobile recording app produce acceptable audio for a starting setup.
What is the difference between a dynamic and condenser microphone for podcasting?
Dynamic mics reject background noise and suit untreated rooms. Condenser mics are more sensitive and suit quiet, treated spaces. Most home podcasters should start with a dynamic mic.